Tiny Crumbs
  • Home
  • Recipes
  • About

Whole Wheat Everything Bagels

10/5/2016

0 Comments

 
Picture
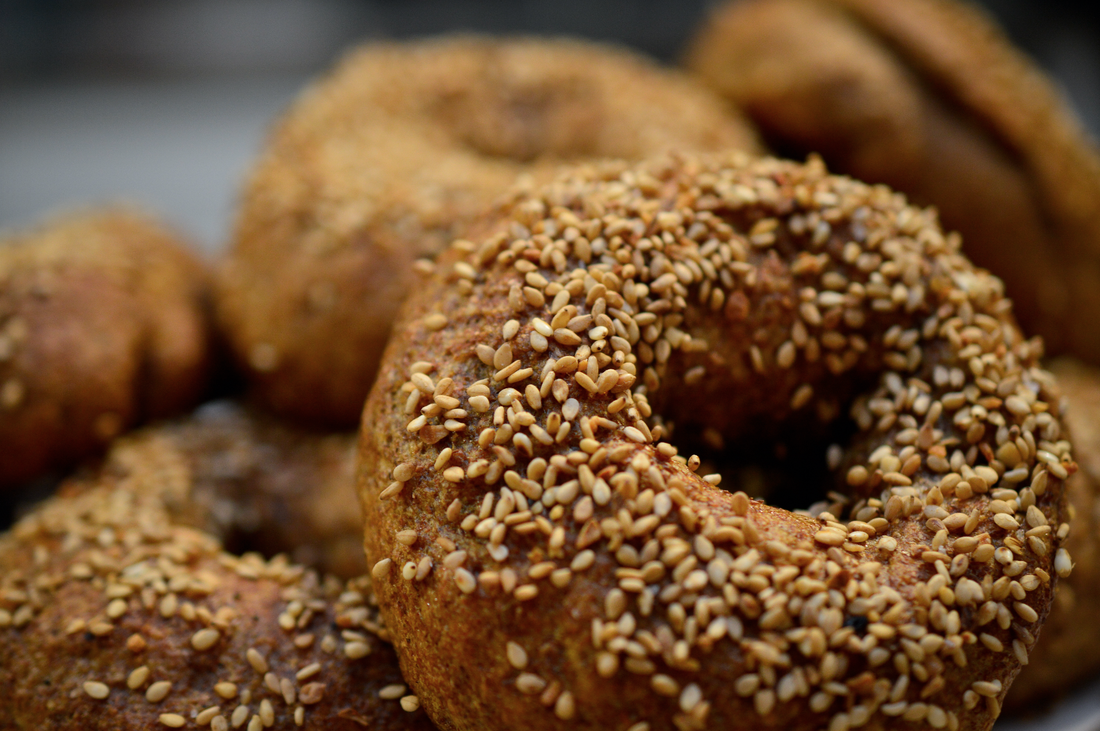
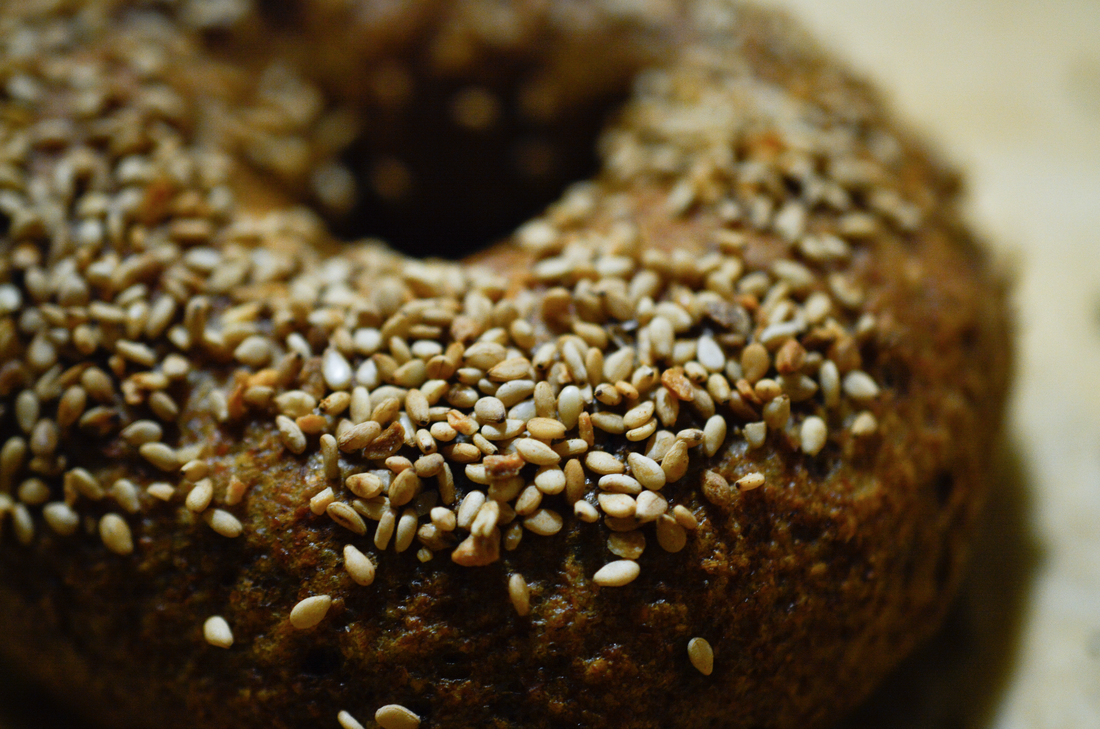
So lately I've really been in the mood for a bagel. Not a cardboard hole-less rock of dough but an actual BAGEL. Currently, I'm not really located in an ideal bagel hub, meaning there is not a little shop where I can get my once in a blue moon bagel fix. So.....I just decided on a whim that today was going to be the day I make bagels (technically not today, but that's how I felt on the day I actually did go about doing the deed).

I recently made this BOMB pumpkin chocolate chip bread (don't fret, recipe is coming soon), and it called for whole wheat flour. For some strange reason, the grocery store doesn't really want to sell you a mini bag of whole wheat flour and would much rather sell you a mini bag of all-purpose white flour. So there I was, lugging a giant bag of whole wheat flour, convinced that this investment of flour would somehow benefit me in the long run. Enter whole wheat bagels. Surprisingly, the only thing I didn't have was instant yeast, but thankfully the grocery store DID come through, as I was able to buy three little packets. 

This took longer than expected, but that's because I snuck a nap in while the dough was rising, and an hour turned into two and a half hours....but the dough was nice and puffed up when I came out of my slumber (#napperks). I started these on a Monday afternoon and finished them that night, so when I was whippin' out my ole Nikon to snap some in progress shots of the beauties, it was fairly dark, and my love of natural light was lost, since the sun set. Knowledge. HOWEVER. My beautiful and talented roommate (shout out to Floyd) pulled through and let me borrow her speedlight when she got home, so I got a few nice little pics of them.  Anywho, here you go!
Picture
Picture
Picture
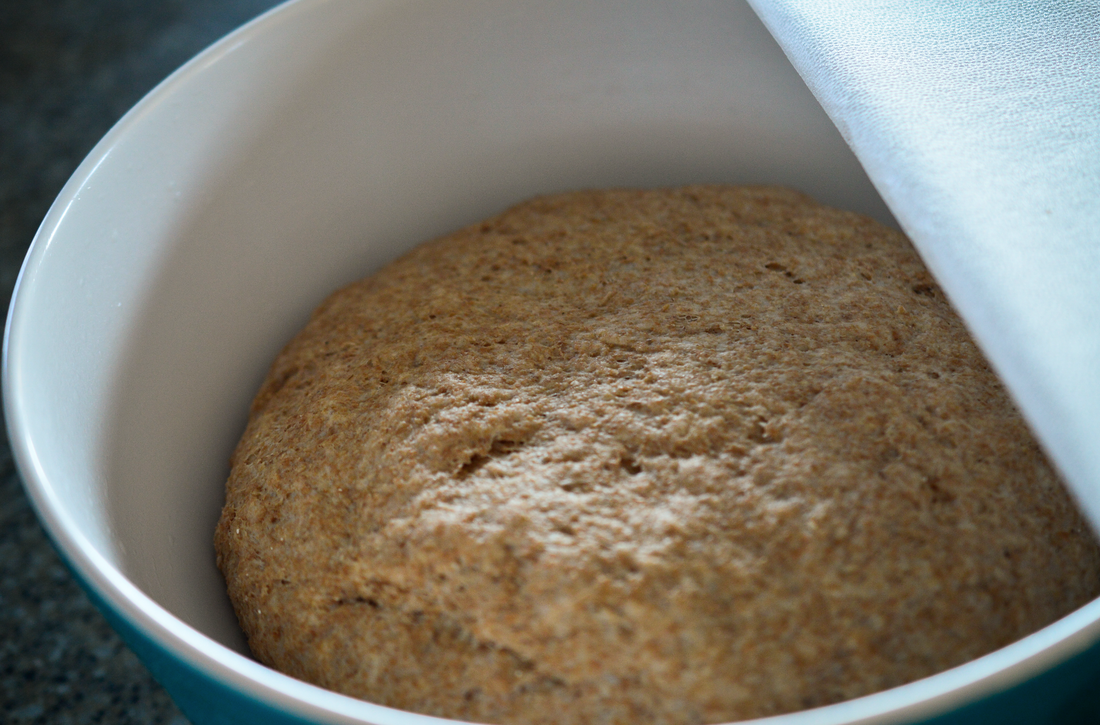
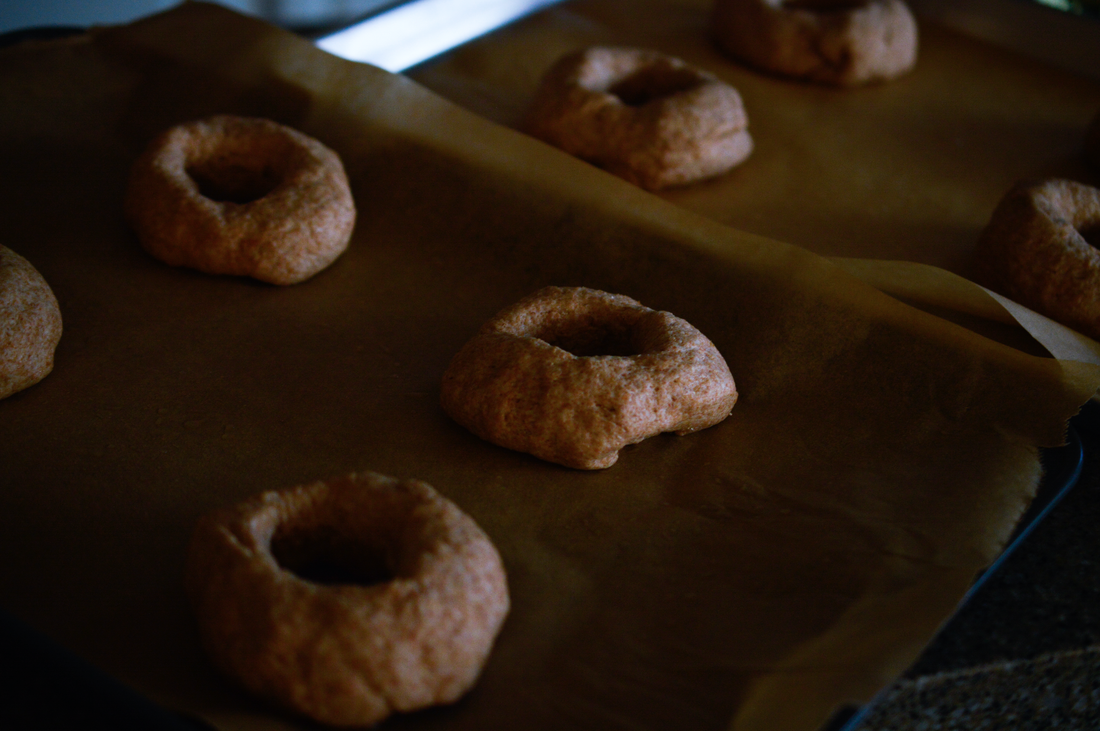
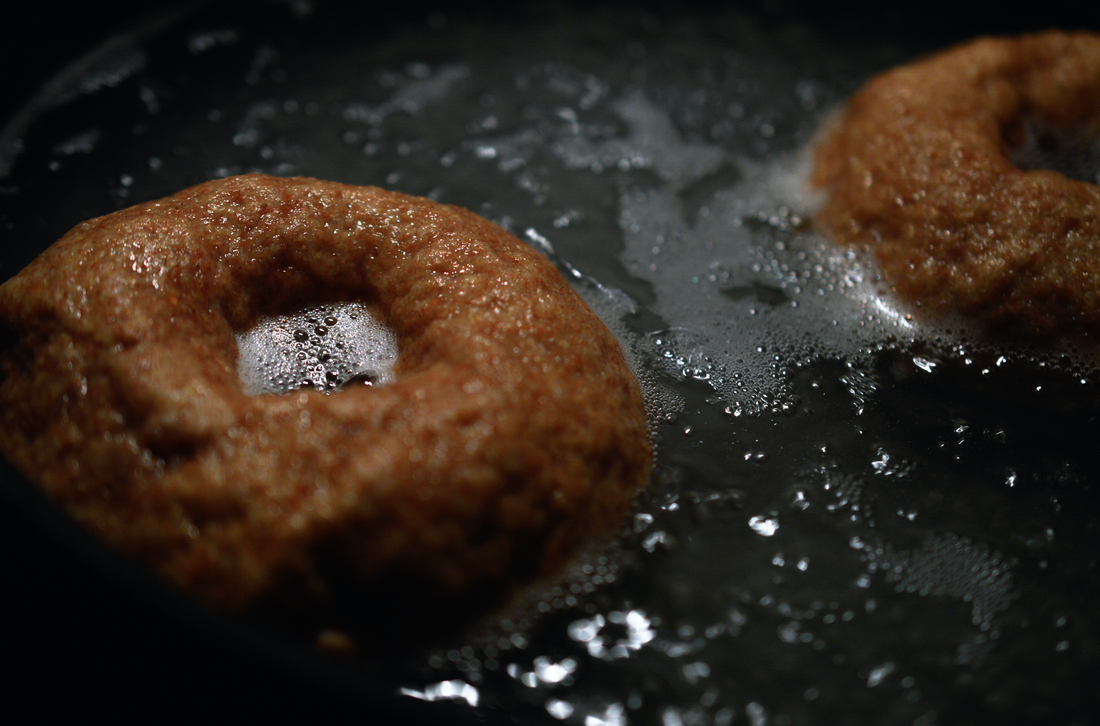
Some people get a little freaked out when making bagels with the thought of oh my gosh, I have to boil water AND put the dough in AND put them in the oven.....

Once you get in the groove of things and have a game plan all mapped out, everything else follows and the difficulty dissipates. Because this was my first time making bagels, they do have a homemade look to them – AKA, they aren't perfectly circular and have some funktified qualities about them. But, let's be honest, I am really the only one eating them, so it doesn't even matter. 

Notes for next time:
  1. I really wish I had poppy seeds. I love poppy seeds. 
  2. Maybe try to incorporate a flavor into the bagels (cinnamon/garlic...etc)
  3. Coat the bagels in the topping of choice, THEN put them on the baking sheets, so you don't end up with a smoking oven and hundreds of burnt sesame seeds causing mini fires in your oven.
  4. Make a variety of flavors! 
  5. *POSITIVE - I did freeze about half of them, so I could enjoy them later on.
Picture

Ingredients

*Adapted from Peter Reinhart's Recipe here
  • 4 1/2 cups of whole wheat flour
  • 1 ¼ tsp sea salt
  • 1 ¼ tsp instant yeast
  • 1 ⅔ cups warm water
  • 1 tbsp honey
  • 2 tbsp baking soda
  • Cornmeal for baking sheets
  • Sesame seeds, dried onion flakes, paprika...(anything you want to top your bagel with)

INSTRUCTIONS

  1. In a large bowl, mix flour, yeast and salt. You can use an electric mixer, but I did this all by hand - so, it is possible.
  2. Dilute the honey in the water, then slowly mix into the dry ingredients.
  3. Let sit for a few minutes, so the yeast activates. 
  4. Once mixed, and the dough is no longer lumpy and is somewhat sticky, place the dough onto a lightly oiled surface - I just used the kitchen countertop.
  5. Knead the dough until it becomes a little more uniform in its texture, then roll into a large ball.
  6. Place the ball of dough in another large, lightly oiled bowl, cover with plastic wrap and let sit in a warm environment for an hour or two, so it can double in size.
  7. After the dough rises, cut it into eight equal sections (or sixteen if you want to make mini bagels), and roll them into little balls.
  8. To make the actual bagel shape, I just poked my fingers through the dough and worked the dough around that (see images above).
  9. Place the bagels onto a baking sheet and cover with a dish towel. Let them rise once more for about twenty minutes. 
  10. Meanwhile, preheat the oven to 425°F.
  11. Fill up a large pan with 2-6 inches of water and bring to a boil. Add the baking soda once the water is boiling. 
  12. When the bagels are ready, put in two at a time (they will float to the surface), and let boil on each side for 30 seconds.
  13. Put bagels onto a clean baking sheet with parchment paper and sprinkle with desired toppings while they are still slightly damp from the water bath.
  14. Once all bagels have been boiled and seasoned, put the baking sheet(s) into the oven for 8-12 minutes, then rotate the sheet for another 8 minutes.
  15. Pull them out of the oven and allow to cool – they will hold for a few days, or you can go on and freeze some of them for future bagel cravings.
0 Comments


Leave a Reply.

    Picture

    About Haley

    Bringing a little slice of California to the Northeast with a "put an egg on it" kind of mentality.  

    Archives

    December 2019
    October 2018
    September 2018
    August 2018
    May 2018
    April 2018
    March 2018
    January 2017
    December 2016
    November 2016
    October 2016
    September 2016

    Categories

    All
    Breads
    Breakfast
    Cake
    Candy
    Cookies
    Dairy Free
    Dessert
    Gluten Free
    Holidays
    Pumpkin
    Refined Sugar Free
    Vegetables
    Whole30

​© HALEY LONGBOTTOM 2016. ALL RIGHTS RESERVED.
  • Home
  • Recipes
  • About